My craft room used to be a spare closet and not the cute Pinterest kind. More like a cramped, overstuffed chaos cave where I’d lose my scissors at least three times per project.
Sound familiar?
Here is the thing you need to know – I didn’t need more space, just smarter space. Once that clicked, everything changed.
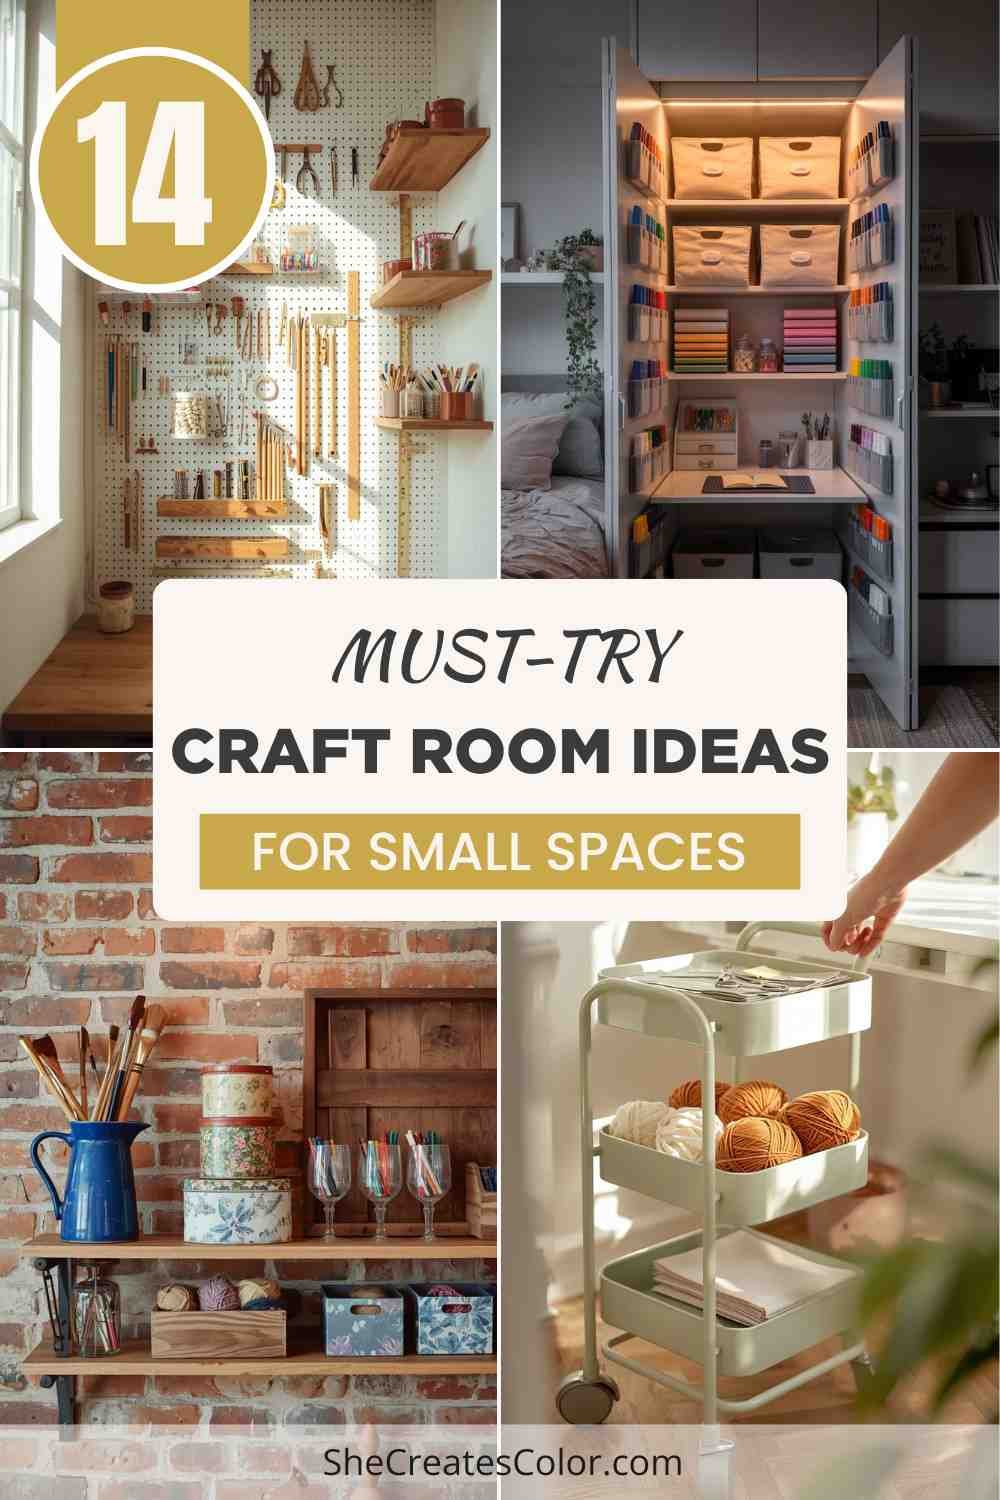
Whether you have got a tiny spare room, a corner of your living room or literally just a closet – these 14 Craft Room Ideas for Small Spaces will help you build something that actually works.
So let’s get right into it.
Table of Contents
1. Use Vertical Wall Space Aggressively
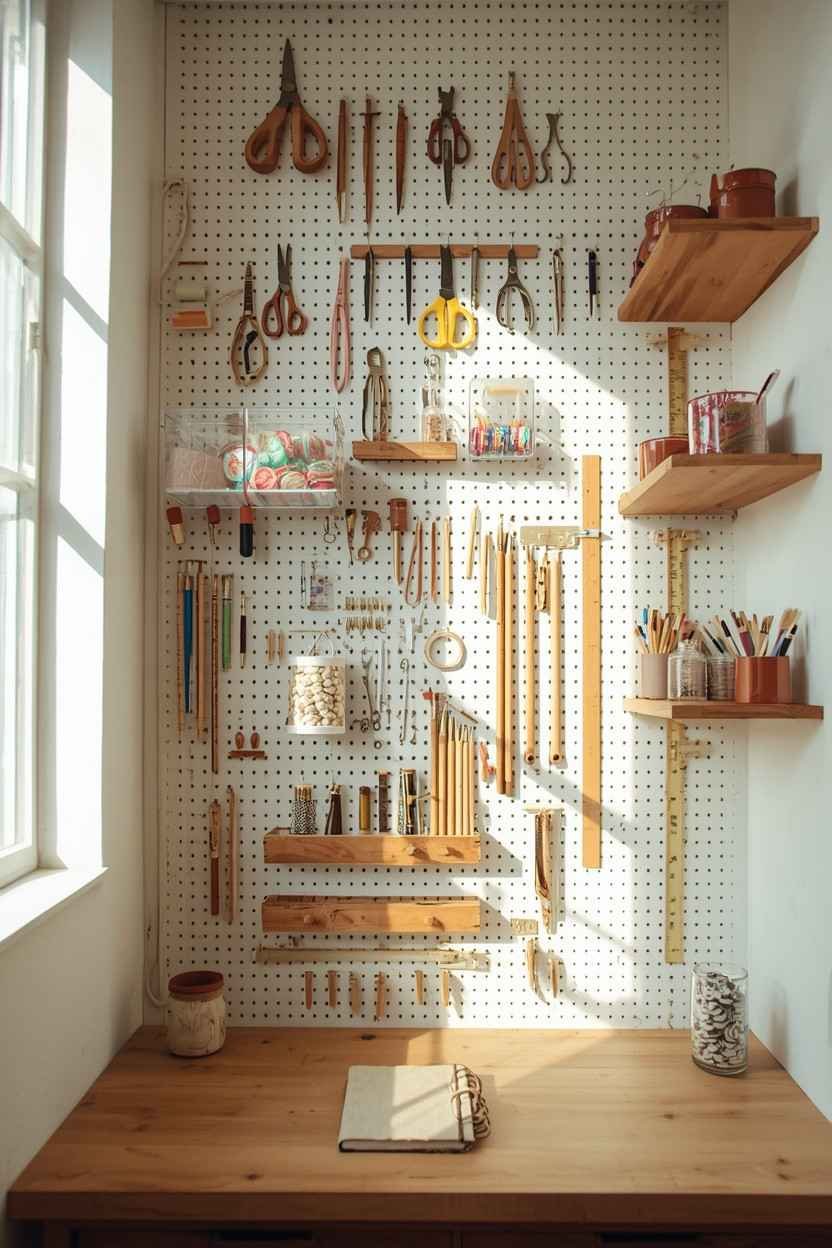
Most crafters look at their walls and think: “great place to hang some cute signs” but that is a totally wrong move. Your walls are free real estate so things like floor-to-ceiling shelving, pegboards and wall-mounted bins are what separate a cramped craft corner from a productive one.
I thought I needed a big table but that turned out to be a bad idea. It just became another dumping zone. However, when I swapped it for a pegboard above the desk, suddenly the surface was clear and my tools stopped disappearing into the chaos.
What to Put on Your Walls:
| 🧠 Idea | How It Helps ❓ |
|---|---|
| Pegboards | Hooks for scissors, rulers, cutters |
| Floating Shelves | Perfect for jars of pens, ribbons and small supply bins |
| Magnetic Strips | Holds metal tools like seam rippers and craft knives |
| Wire Grid Panels | Use S-hooks to hang bags of supplies and flexible storage items |
The higher you go, the more floor and desk space you free up – simple math.
2. Turn a Closet Into a Craft Nook
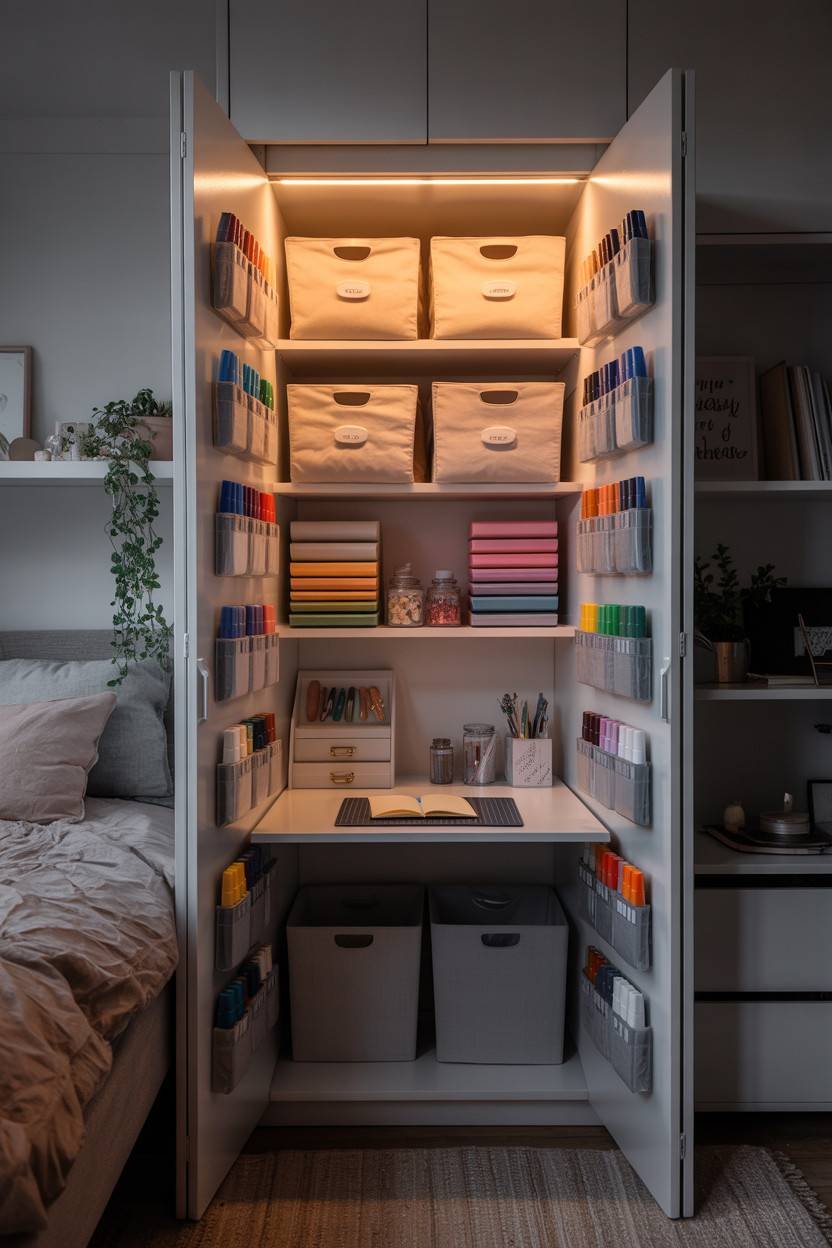
If you’ve got a spare closet, you basically already have a craft room. A standard 24-inch deep closet is enough for a fold-out desk, shelves on all sides and even door organizers to keep everything within reach.
The door is often the most wasted surface so hang an over-the-door shoe organizer and fill it with paint bottles, glue sticks, stamps or markers. That one move alone gives you 24+ pockets of storage that previously didn’t exist.
Add a single LED strip light along the top shelf, mount a small fold-down surface and you have a dedicated craft station that tucks completely away when you close the door.
3. Get a Rolling Cart (Seriously, Just Get One)
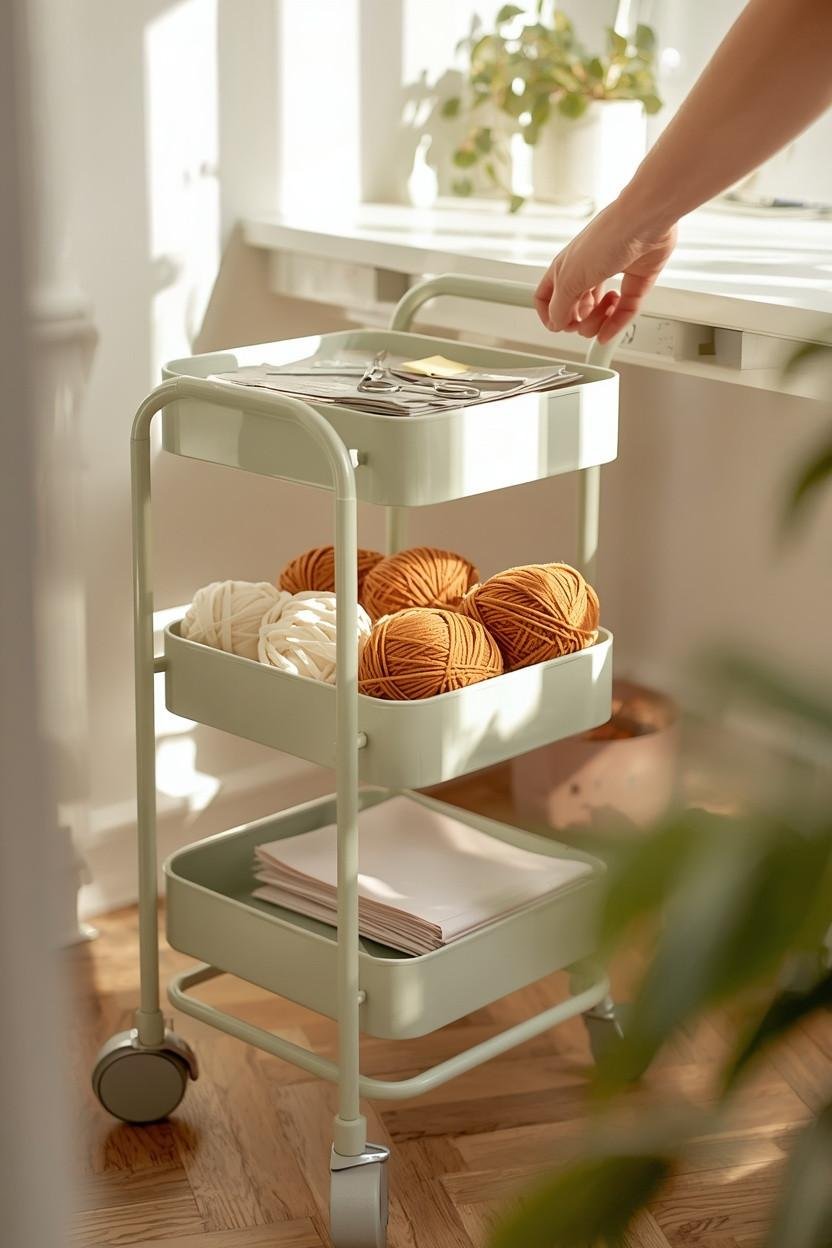
If I had to pick just one thing that upgraded my small craft space, it’d be a tiered rolling cart – super practical.
Load it up with your current project, roll it anywhere in the house and slide it under a desk or into a corner when you’re done. No mess, no space taken over.
The Alex drawer system from IKEA around $130 depending on your location is popular among crafters for a reason. It rolls, it has lots of shallow drawers perfect for flat supplies and it slides neatly under most desks.
4. Use a Fold-Down Wall Desk
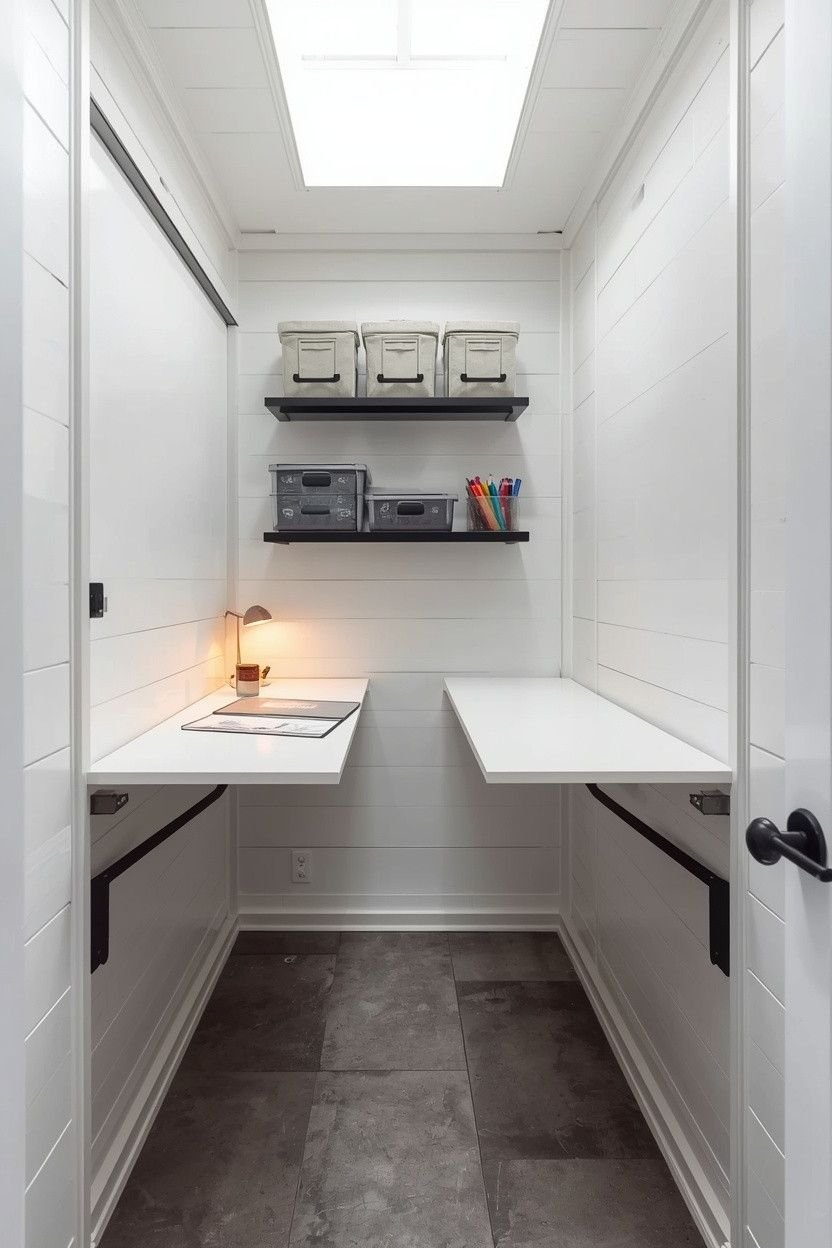
A fold-down (Murphy-style) desk might sound like overkill, but in a small craft space, it is a completely game changer.
Closed: It blends in like a wall panel.
Open: You’ve got a full workspace ready to go.
Pair it with wall-mounted shelves and bins directly above it and you get a complete craft station that occupies almost zero floor space when not in use. Perfect for living rooms, bedrooms or any room you need to share with non-crafting activities.
5. Label Everything (Yes, Everything)

I avoided labeling for years thinking I’d just remember where everything was.
Plot Twist: I never did
In a small space, labeling is not optional instead it is essential. When everything’s stacked, hidden or looks the same, clear labels save you from digging through everything just to find one tool.
Easy Labeling Options:
| 🏷️ Labeling Idea | Why It Works |
|---|---|
| Label Maker | Clean, uniform, easy-to-read labels for bins & drawers |
| Chalkboard Labels | Rewritable – perfect when your storage keeps changing |
| Masking Tape + Marker | Not pretty, but super quick and gets the job done |
| Clear Acrylic Containers | See everything inside – no labels needed |
6. Build a Paper and Cutting Station
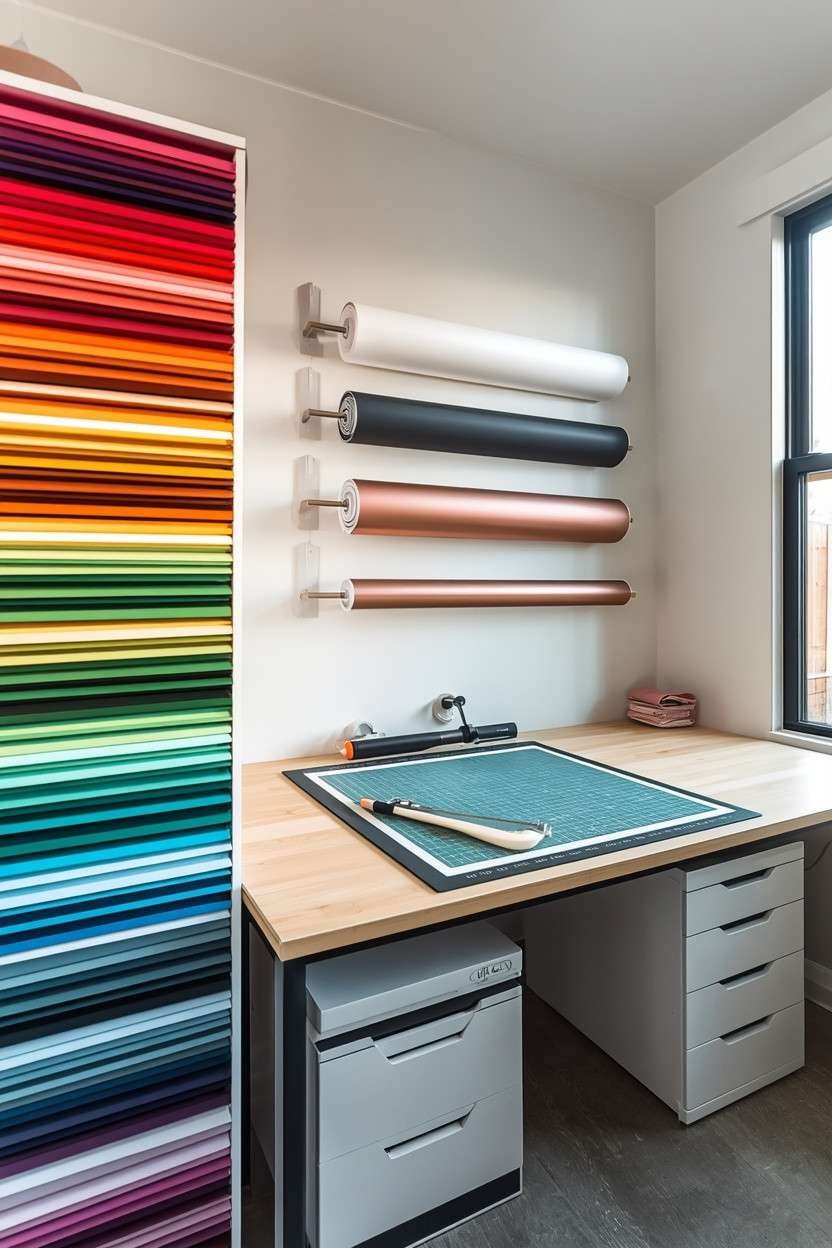
Paper crafters, scrapbookers, and Cricut users know the struggle that big sheets, cutting mats and vinyl rolls never have a proper place. They end up shoved against walls, curling at the edges or crushed at the bottom of bins.
Dedicate a specific spot just for your paper and cutting supplies. A vertical file organizer for large paper sheets, a flat shallow drawer for cutting mats and wall-mounted dowel rods for vinyl rolls.
📦 Smart Storage Idea:
If you do a lot of paper crafting, consider a dedicated paper storage tower. Vertical file rack towers can sort paper by size, color or type while taking up only about 10 inches of counter space.
7. Make Use of the Space Under Your Desk
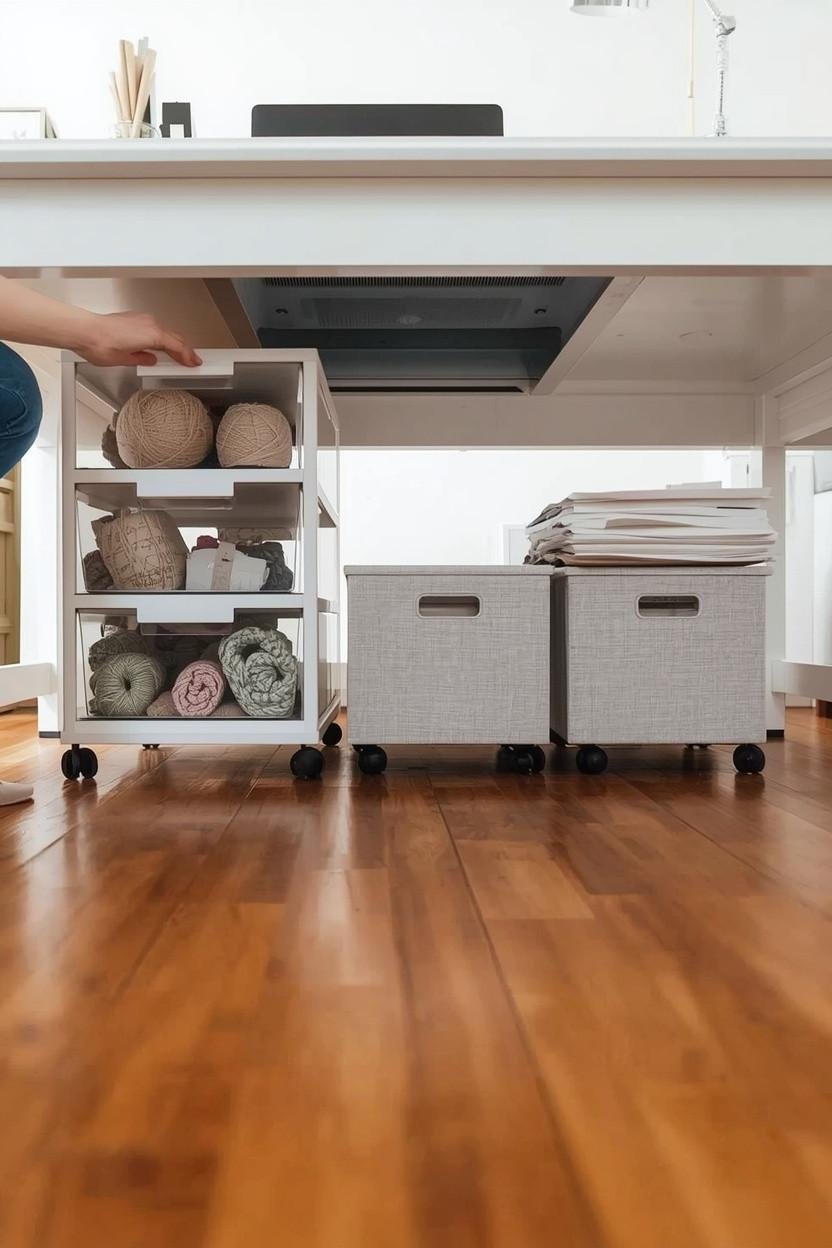
Under-desk space is genuinely underused in most craft rooms. You have at minimum a few cubic feet of open space down there – use it.
Rolling plastic drawer units fit perfectly under most desks and hold an enormous amount of supplies. Stackable bins on casters are another great option – you can pull them out when you need them and push them back in when you don’t.
Good Under-Desk Storage Picks:
| 🧺 Storage | Use |
|---|---|
| 3-Drawer Rolling Carts | Yarn, fabric, paper |
| Cube Organizers + Bins | Bulky items |
| Flat Shallow Bins | Cardstock, foam sheets |
| Baskets on Casters | Tote bags, supplies |
The Trick?
Put everything on wheels – so whatever is under your desk slides right out. No crawling, no digging around.
8. Repurpose Unexpected Storage Items
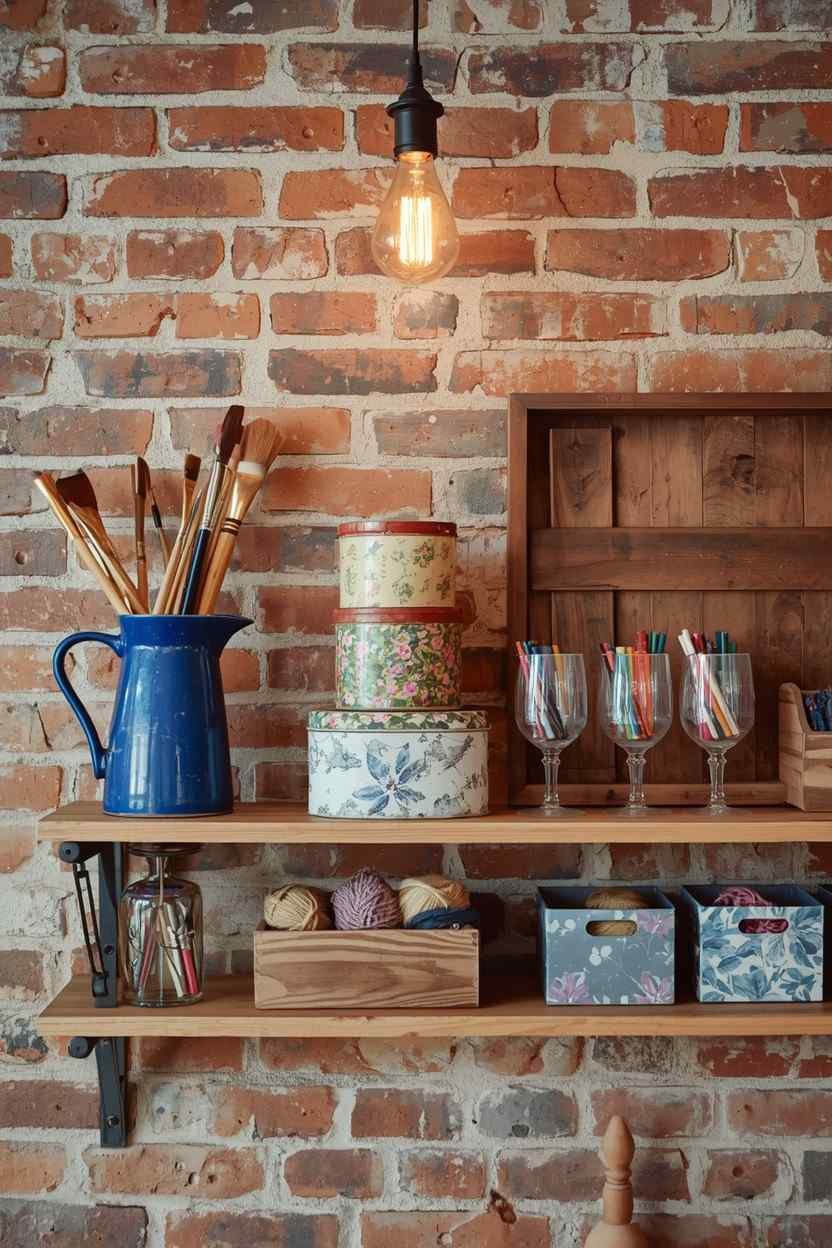
You don’t need to buy everything from a craft store. Some of the best organizers are already in your home or at least cost almost nothing.
Old Cookie Tins = perfect for tiny bits like brads, clips and eyelets.
Vintage Pitchers or Tall Glasses? Great for brushes, pens and rulers (and they look good on shelves).
Even Plain Shoe Boxes Work – just decorate and stack them to sort paper scraps by color.
Most crafters keep organization budgets low and many rely on everyday household items instead of buying expensive storage solutions.
Honestly, go to a thrift store before buying organizers because you’ll find cooler stuff for way cheaper than those basic plastic bins.
9. Create Zones (Even in Tiny Spaces)
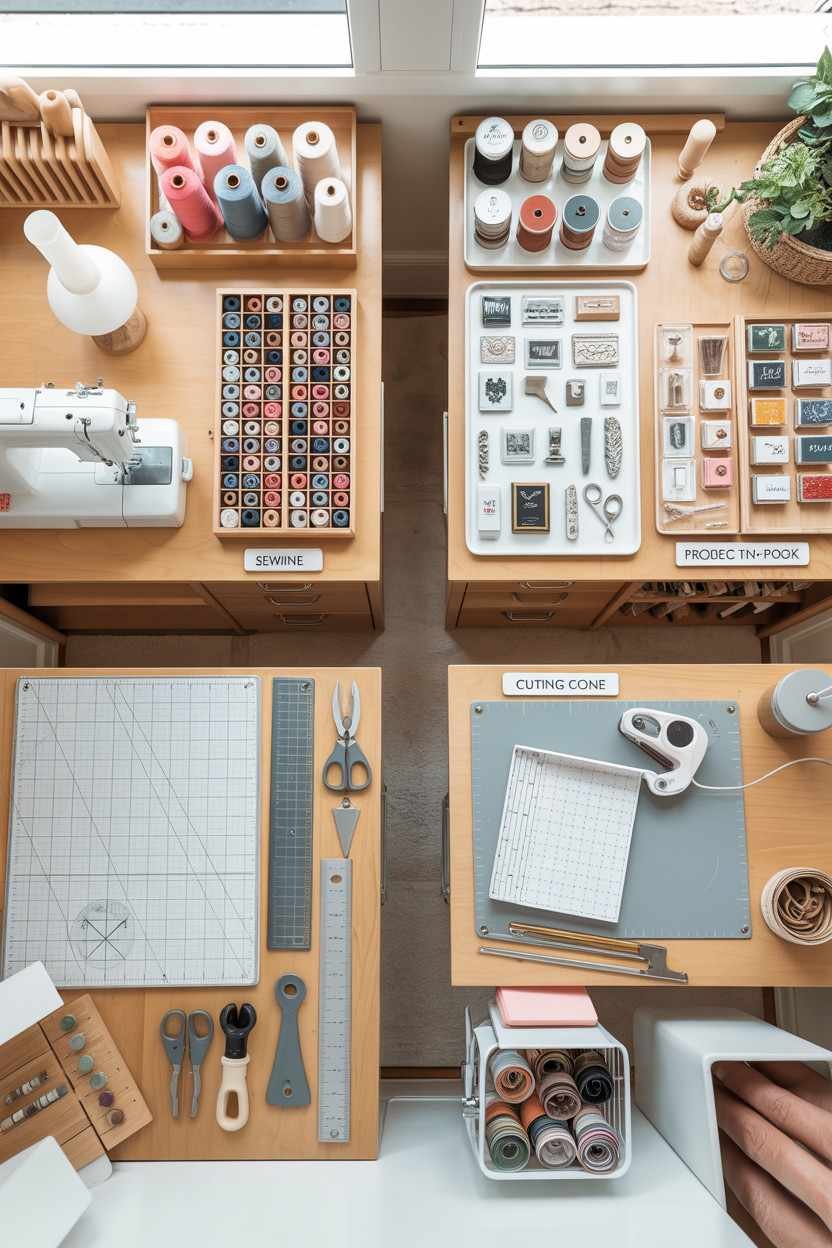
A small space doesn’t mean it can’t be organized by purpose.
Zoning (keeping activities and their supplies grouped together) turns a tiny craft room from messy clutter into something that actually feels planned.
You don’t need walls or barriers to create zones because even in a 10×10 room or smaller, you can have:
| 🧵 Zone | Setup |
|---|---|
| Cutting Zone | Desk with mat, rotary cutter & ruler within arm’s reach |
| Sewing Zone | Machine, bobbins, thread & attachments kept together |
| Paper Crafting Zone | Stamps, ink, paper & embossing tools on one shelf |
| Project-in-Progress Zone | Dedicated shelf/cart for current work only |
When everything for one task lives in one spot, you stop wasting 15 minutes “setting up” every time you want to craft.
10. Use Clear Containers for Everything You Grab Often
Opaque containers are great for long-term storage but for everyday supplies such as the stuff you reach for during every project, clear is the way to go.
Clear acrylic drawers, glass jars and clear bins save time as you can see everything instantly, no opening or searching. Plus, a shelf full of colorful buttons or washi tape in clear jars just looks super satisfying and organized.
📦 Smart Upgrade:
Stack acrylic drawers to use vertical space better while still keeping everything visible. Not the cheapest option but one of the most practical upgrades for a small craft setup.
11. Maximize Your Door (All Doors)
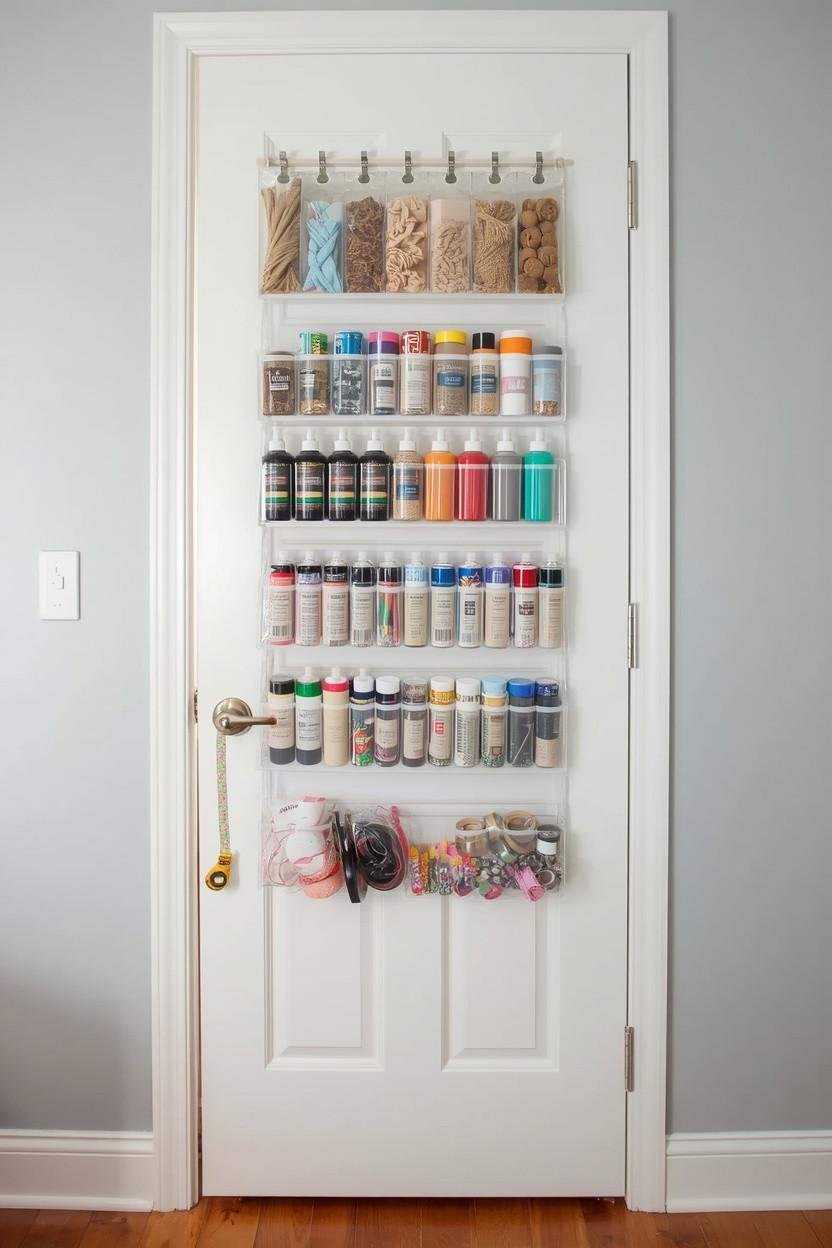
We already talked about closet doors but honestly every door in your craft space is a potential storage opportunity. The back of a room door, cabinet doors and even the side panels of open shelving units.
Adhesive hooks, tension rods and magnetic strips all stick onto doors without drilling needed. Even a simple over-the-door organizer with clear pockets can hold ribbon, stamps, spray bottles and more freeing up shelf and counter space completely.
One good door organizer can hold the equivalent of two full shelves worth of small supplies. That is a BIG win when you’re working with limited square footage.
12. Go with a Foldable or Extendable Work Table
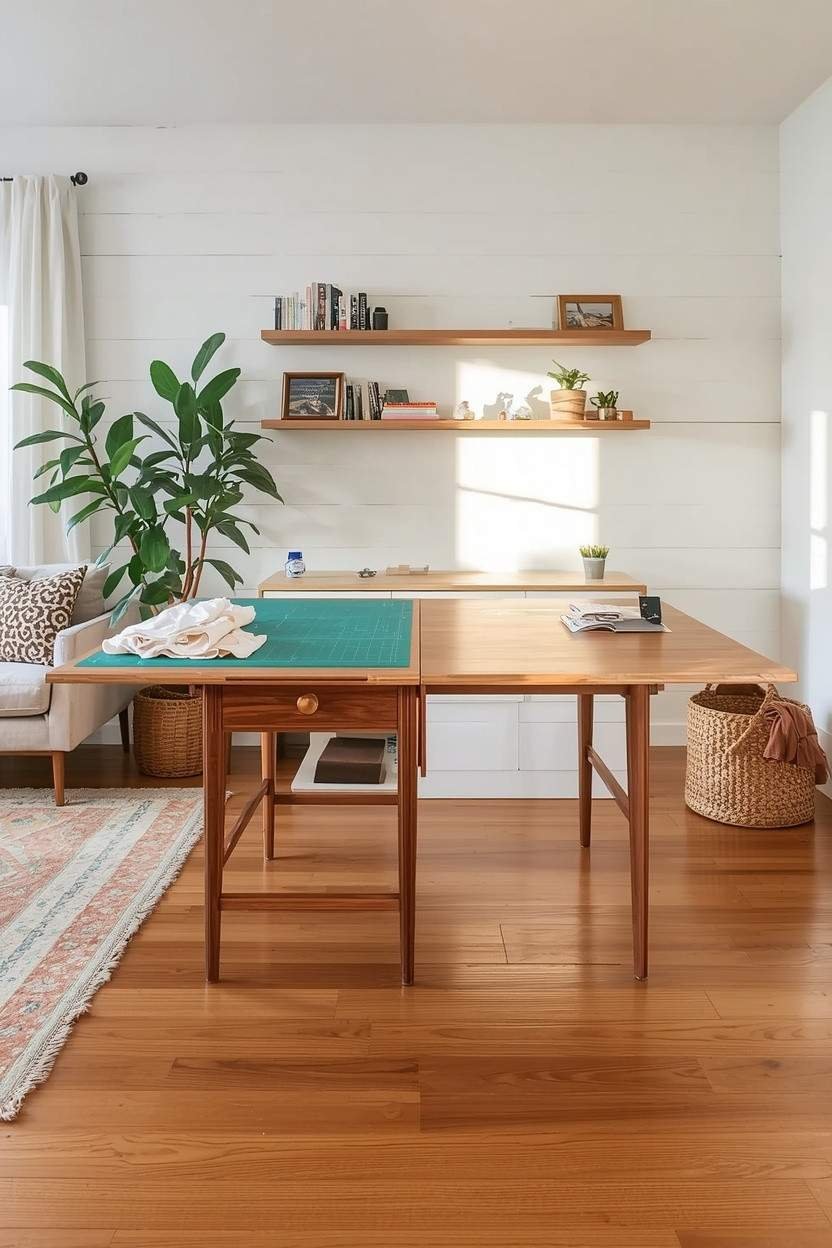
A fixed desk in a small craft room is a bit of a trade-off. You always have a workspace… but you also always have a workspace sitting there, taking up space even when you’re not using it.
A fold-down wall table or extendable desk is perfect since you get a full work surface when you need it and almost nothing when you don’t. Some crafters even use drop-leaf tables that expand to a 4-foot workspace, then shrink down to a slim 12-inch console against the wall.
🪑 Workspace Setup Tip:
The important thing is making sure your table is at the right height for how you craft. Standing height works better for cutting, while sitting height is better for detailed work like embroidery or card-making.
13. Light It Up Properly
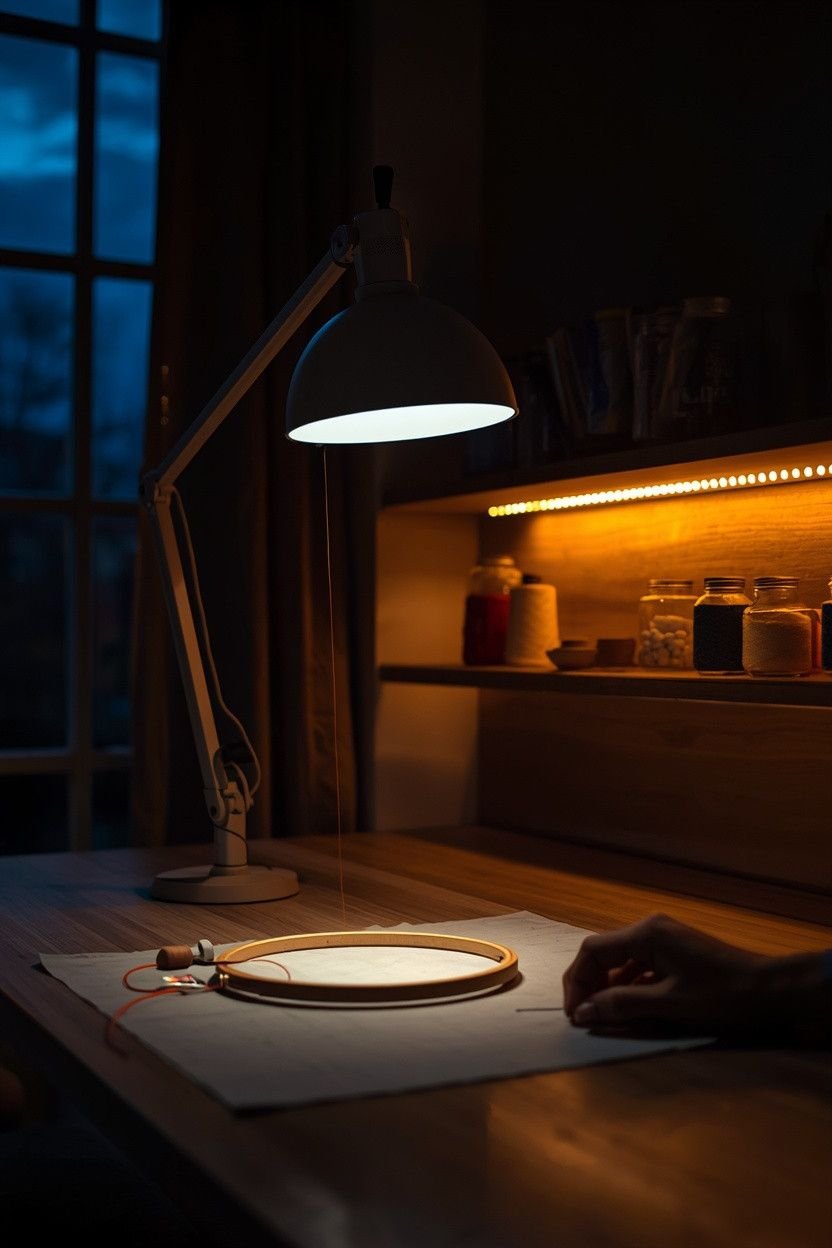
Bad lighting in a craft room is not just annoying but it actually messes with your work. Matching fabric colors, making precise cuts, even threading a needle all get harder when you can’t see properly.
Natural light is the best so if you have the option of placing your main work surface near a window, do it. For artificial lighting, go bright and neutral like 4000K to 5000K color temperature bulbs that give you a clean, white light that doesn’t distort colors.
Craft Room Lighting Essentials:
| 💡 Lighting Idea | Why It Helps |
|---|---|
| Overhead Ambient Light | Provides overall visibility for the whole space |
| Adjustable Task Lamp | Focused light right on your work surface |
| LED Strip Lighting | Brightens shelves and reduces shadows |
| Daylight Bulb | Helps with accurate color matching |
A The Daylight Company desk lamp (about $45 online) is a crafter favorite for a reason because it gives bright, true-to-color light with zero flicker, so your work actually looks how it should.
14. Edit Your Supplies First, Then Organize
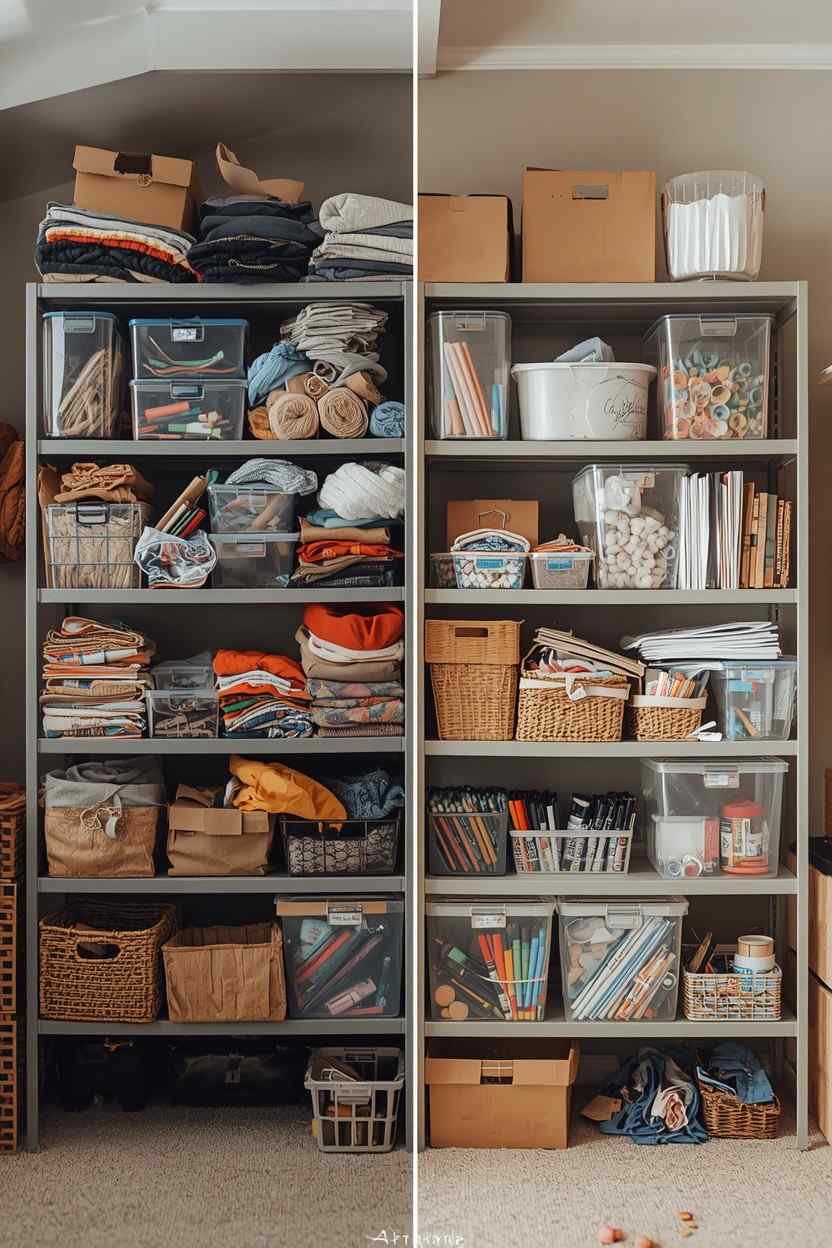
Here’s the uncomfortable truth: if you’ve got too much stuff, no amount of clever organizing is going to save you. A small craft space will still feel cramped if you’re trying to squeeze in way more than it can realistically hold.
Before buying a single bin or shelf, go through everything you have. Get rid of supplies for crafts you never actually do. Toss the dried-out markers and the half-used paper you’ve been “saving.” Donate the fabric you haven’t touched in two years.
One crafter put it perfectly: the moment she stopped hoarding supplies for “someday” projects, her tiny room suddenly felt twice as organized and she didn’t buy a single new storage box.
Craft Room Ideas for Small Spaces At a Glance
| 💡 Idea | 💰 Cost Level | 📦 Space Saved |
| Vertical Wall Pegboard | Low ($ | High |
| Closet Craft Nook | Low–Mid | Very High |
| Rolling Cart | Low–Mid | High |
| Fold-Down Desk | Mid | Very High |
| Label Everything | Very Low | Medium |
| Paper Station | Low | Medium |
| Under-Desk Storage | Low | High |
| Repurposed Containers | Very Low | Medium |
| Zone Your Space | Free | High |
| Clear Containers | Low–Mid | Medium |
| Door Organizers | Low | High |
| Foldable Table | Mid | High |
| Proper Task Lighting | Low–Mid | N/A |
| Edit Supplies First | Free | Very High |
Final Thoughts
You don’t need a huge room or a massive renovation budget to have a craft space that actually works. You need walls that pull their weight, storage that fits the way you actually craft and most importantly less stuff than you think you need.
Start with 1-2 of these small craft room ideas and see what actually improves. Then build from there. Best move? Sort your supplies first, then add a rolling cart or a simple pegboard to keep things organized and within reach.